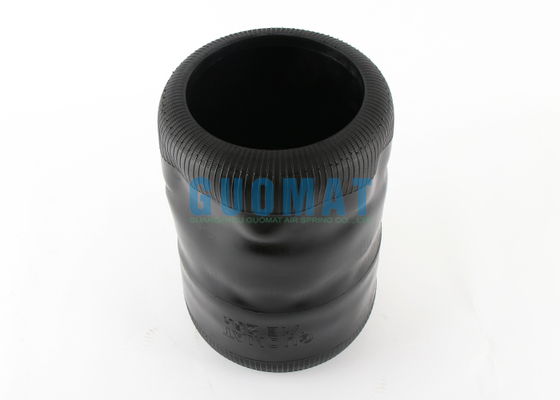
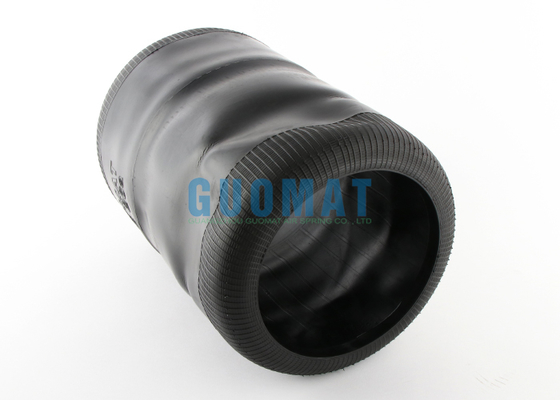
V1E26A Vibracoustic Bus Rubber Air Bellows 370mm Natural Height Freightliner Air Spring
How to Install a Bus Suspension Air Spring
Step 1: Safety Preparation
Parking the Vehicle: Park the vehicle on a flat, firm surface, apply the parking brake, and chock the wheels.
Releasing Air Pressure:
Method A (via the height control valve): Start the vehicle and fill the air system. Then, locate the height control valve for the appropriate suspension (usually located near the axle). Manually move the control arm to the opposite position from "Inflate" or "Raise." The system will begin to bleed air. Once the bleed sound stops, pressure is released.
Method B (Direct Bleeding): After ensuring the vehicle is securely supported, carefully disconnect the air hose connector from the air spring to bleed air. Caution: Do not point the bleed port toward people or objects.
Raise and Support the Vehicle: Raise the vehicle using a lift or jack up the axle/frame. Then, place safety brackets on a solid surface (such as designated frame support points). Ensure the vehicle is secure.
Step 2: Remove the Old Air Spring
Disconnect the Air Supply: Locate the air hose connector connected to the old air spring. Depress the retaining ring (or other locking device) on the connector and pull outward to disconnect the air hose.
Removing Mounting Parts:
For Bolt-On Air Springs: Use a socket and wrench to remove the bolts from the upper and lower mounting plates. The upper end is typically attached to the vehicle frame or subframe, while the lower end is attached to the axle or control arm.
For Clamp-On Air Springs: This is commonly seen with conduit-type air springs. Use circlip pliers to remove the metal clamps at the upper and lower ends.
Removing the Old Air Spring: After all mounting parts have been removed, carefully remove the old air spring. Sometimes it may be slightly compressed and require some wiggling to remove.
Step 3: Installing the New Air Spring
Cleaning the Mounting Surfaces: Use a rag to clean the mounting surfaces on the frame and axle, ensuring they are free of dirt, debris, and old seals that could affect the seal or installation accuracy.
Placing the New Spring: Place the new air spring in its mounting position. Note: If there is a difference between the top and bottom (such as the orientation of the air hose connector), ensure the correct orientation. Typically, the air hose connector should face the direction that facilitates connection.
Installing the Fixtures:
Bolt-on Fixing: First, hand-tighten all bolts several times to ensure thread alignment, then gradually pre-tighten them diagonally with a tool. Do not fully tighten yet.
Clamp-on Fixing: First, place the clamp over the bladder or base. Once aligned, use circlip pliers to snap it into the groove, ensuring it is secure and level.
Connecting the Air Source: Clean the previously disconnected air hose connector and insert it directly into the valve on the new air spring until you hear a click, indicating the circlip is locked. Gently tug to confirm a secure connection.
Step 4: Initial Inspection and Inflation
Lowering the Vehicle: Slowly lower the vehicle using the lift or jack, allowing the vehicle's weight to gradually be shared by the safety stand and suspension, until the wheels are just touching the ground (but not fully bearing the weight). This step allows the air spring to assume its natural installed position.
Final Tightening: Under the weight of the vehicle, use a torque wrench to tighten all mounting bolts diagonally to the manufacturer's specified torque.
Inflation Leak Check:
Start the vehicle and run the air compressor to inflate the new air spring.
Immediately spray all connections (air pipe connection, upper and lower mounting surfaces) with soapy water and observe for bubbles.
If bubbles are present, this indicates a leak and requires re-inspection and tightening of the relevant connections.
Completely Lower the Vehicle: After confirming there are no leaks, remove the safety stand and lower the vehicle completely to the ground.
Step 5: Final Test and Adjustment
Check Vehicle Height: Fully load the vehicle and inflate it to the normal height. Observe whether the height is consistent on both sides. If not, adjustment may be required by adjusting the height control valve connecting rod.
Road Test: Take a short test drive to experience the vehicle's performance over bumpy roads, cornering, and braking to ensure the suspension operates properly and detect any unusual noises.
Re-inspection: After the road test, re-inspect the air springs and their connections for leaks or looseness.

 Your message must be between 20-3,000 characters!