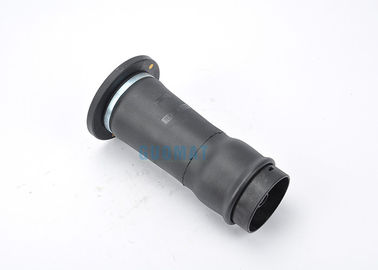
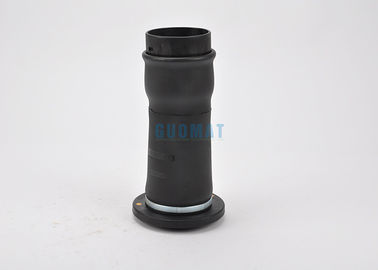
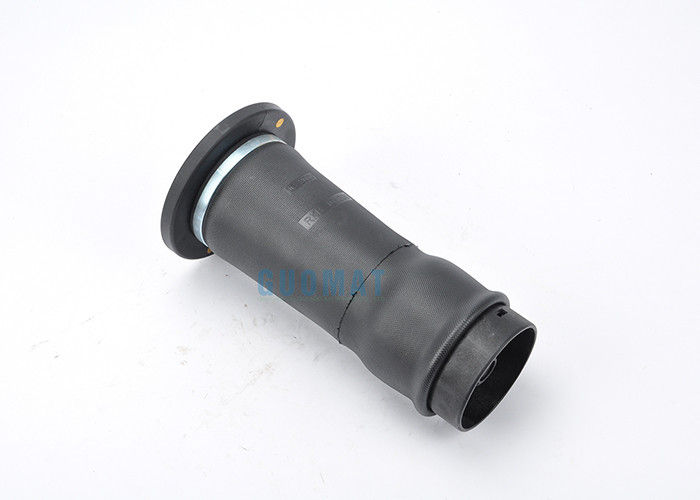
Air Spring Bags1998 to 2004 Year RKB101200 Rear Left / Right Land Rover Discovery 2
Specifications
| Type |
Air suspension spring |
Model NO. |
504017 |
| Car make |
Land Rover |
Package |
Carton/Cartons |
| Position |
Rear Left / Right |
Warranty |
One year |
| Rubber type |
Natural rubber |
Place of origin |
Guangzhou China(main land) |
| Manufacturer part NO. |
RKB101200
|
Construction Year: |
1993-2004
|
Pneumoballon rear right / left
Original part number:
RKB101200
Fits on the car: Land Rover Discovery 2 1998-2004.
Produced by: GUOMAT.CHINA.
Suitable for the right and left side of the rear axle of the car.
This Air Suspension Bag is compatible with following vehicles.
| Year |
Car Make |
Model |
Trim |
Engine of car |
| 2004 |
Land Rover |
Discovery |
HSE Sport Utility 4-Door |
4.6L 4554CC 278Cu. In. V8 GAS OHV Naturally Aspirated |
| 2004 |
Land Rover |
Discovery |
S Sport Utility 4-Door |
4.6L 4554CC 278Cu. In. V8 GAS OHV Naturally Aspirated |
| 2004 |
Land Rover |
Discovery |
SE Sport Utility 4-Door |
4.6L 4554CC 278Cu. In. V8 GAS OHV Naturally Aspirated |
| 2003 |
Land Rover |
Discovery |
Base Sport Utility 4-Door |
4.6L 4554CC 278Cu. In. V8 GAS OHV Naturally Aspirated |
| 2003 |
Land Rover |
Discovery |
HSE Sport Utility 4-Door |
4.6L 4554CC 278Cu. In. V8 GAS OHV Naturally Aspirated |
| 2003 |
Land Rover |
Discovery |
S Sport Utility 4-Door |
4.6L 4554CC 278Cu. In. V8 GAS OHV Naturally Aspirated |
| 2003 |
Land Rover |
Discovery |
SE Sport Utility 4-Door |
4.6L 4554CC 278Cu. In. V8 GAS OHV Naturally Aspirated |
| 2002 |
Land Rover |
Discovery |
Base Sport Utility 4-Door |
4.0L 3950CC V8 GAS OHV Naturally Aspirated |
| 2002 |
Land Rover |
Discovery |
Series II SD Sport Utility 4-Door |
4.0L 3950CC V8 GAS OHV Naturally Aspirated |
| 2002 |
Land Rover |
Discovery |
Series II SE Sport Utility 4-Door |
4.0L 3950CC V8 GAS OHV Naturally Aspirated |
| 2001 |
Land Rover |
Discovery |
Base Sport Utility 4-Door |
4.0L 3950CC V8 GAS OHV Naturally Aspirated |
| 2001 |
Land Rover |
Discovery |
Series II LE Sport Utility 4-Door |
4.0L 3950CC V8 GAS OHV Naturally Aspirated |
| 2001 |
Land Rover |
Discovery |
Series II SD Sport Utility 4-Door |
4.0L 3950CC V8 GAS OHV Naturally Aspirated |
| 2001 |
Land Rover |
Discovery |
Series II SE Sport Utility 4-Door |
4.0L 3950CC V8 GAS OHV Naturally Aspirated |
| 2000 |
Land Rover |
Discovery |
Series II Sport Utility 4-Door |
4.0L 3950CC V8 GAS OHV Naturally Aspirated |
| 2000 |
Land Rover |
Discovery |
V8 Sport Utility 4-Door |
4.0L 3950CC V8 GAS OHV Naturally Aspirated |
| 1999 |
Land Rover |
Discovery |
SD Sport Utility 4-Door |
4.0L 3950CC V8 GAS OHV Naturally Aspirated |
| 1999 |
Land Rover |
Discovery |
SE7 Sport Utility 4-Door |
4.0L 3950CC V8 GAS OHV Naturally Aspirated |
| 1999 |
Land Rover |
Discovery |
Series II Sport Utility 4-Door |
4.0L 3950CC V8 GAS OHV Naturally Aspirated |
| 1998 |
Land Rover |
Discovery |
50th Anniversary Edition Sport Utility 4-Door |
4.0L 3950CC V8 GAS OHV Naturally Aspirated |
| 1998 |
Land Rover |
Discovery |
LE Sport Utility 4-Door |
4.0L 3950CC V8 GAS OHV Naturally Aspirated |
| 1998 |
Land Rover |
Discovery |
LSE Sport Utility 4-Door |
4.0L 3950CC V8 GAS OHV Naturally Aspirated |
| 1998 |
Land Rover |
Discovery |
SD Sport Utility 4-Door |
4.0L 3950CC V8 GAS OHV Naturally Aspirated |
| 1998 |
Land Rover |
Discovery |
SE7 Sport Utility 4-Door |
4.0L 3950CC V8 GAS OHV Naturally Aspirated |
Other names
Suspension Air Bladder, Air Suspension Bag, Air Ride Bag, Air Suspension Spring ,Air Balloon Air Bellows. Air Spring Bellow, Air strut
The Advantages of Air Spring
However, it does it in a different manner. Instead of compressing as it absorbs impact, this component uses air to give the vehicle the support it needs. It does this by using an air-filled cylindrical chamber that's positioned between the wheels and the vehicle's body. The vibrations made by the wheels are then absorbed by this component with the help of stored air. Because of this, driving through rough terrains won't be a problem.
Why Choose GUOMAT
The Air Suspension Compressor supplies air for every piece of air equipment on the vehicle. GUOMAT suspension compressor allows the required amount of air to be dispersed to the bags. Customers benefit from our technological expertise and long years of experience .
Air connections are exactly the same spread as the valve of the original equipment of the vehicle. GUOMAT suspension compressor supports the air suspension system to provide a smooth and safe ride. GUOMAT has been developing and producing high-quality products in the field of air springs and air actuators.
The 8 steps to install a New Air Spring on Your Vehicle
Replacing a broken air spring may require the help of a mechanic, but you can cut down your expenses by simply installing it yourself.
1: Parking your car on a level surface then using the floor jack to lift it up. Place the jack stands underneath the vehicle for support.
2: Remove the wheels by detaching its lug nuts one by one. Use a wrench for this procedure.
3: Deflate the air spring by opening the air mouth on the top.
4: Detach the set of fasteners that secure the air spring in place. You can generally find these bolts on the control arm and under the hood. Keep in mind that the set of procedures for removing an air spring vary for each car, so make it a point to consult your owner's manual to see exactly how yours is removed.
5: Remove the old air spring away from the shock carefully. If needed, use a spring compressor to make the remove easier. You may reuse the O rings connecting the air spring to the shock.
6: Put the new air spring on the place where you removed the old one.
7: Reconnect it to the shock using the O rings you removed earlier. Make sure you apply lubricant on them before putting them back.
8: Reattach all the components that you removed. Recheck if there are no missing bolts, nuts and fittings.


REAR -- AIR SPRING ASSEMBLY
Remove
WARNING: Theairsuspensionsystemcanbepressurizedupto 10bar(150lbf/in2). It’salwaysimportanttomakesurethatdirtorgrease doesn’tentersystem. Alwayswearhand,earandeyeprotectionwhenservicing the air suspension system.
WARNING: Do not inflate the air spring assembly unless it is supported on both ends by the vehicle frame and suspension system. Failure to observe this warning may result in serious injury and damage to the air springs assembly. YOU SHOULD NEVER ATTEMPT TO DISMANTLE THE AIR SPRINGS.
-
Raise the vehicle on a hoist or other adequate structure. WARNING: Always support the vehicle on safety stands. Refer to your owner’s manualforcorrectliftinginstructions. Removeroadwheel.
-
Disconnect the pipe from top of air spring. Removing the air fitting will depressurize the air spring.
-
Seal off hose to prevent dirt or grease fromentering system.
-
Remove the 2 clips securing the top of the air spring to chassis.
-
Collapse the air spring.
-
Rotate the air spring to unlock it from axle, and remove the old air spring
fromthe vehicle.
-
Remove the old air connector fromthe pipe.
CAUTION: Whenrefittingthenewairspring,donotallowthevehicleto restonthedeflatedairspring. Thechassismustbesupporteduntilthenew
air spring is inflated.
Refit
-
Clean off the surface of air spring, axle, and chassis.
-
Refit the new air fitting to the pipe.
-
Install the new air spring onto the axle and rotate 90° to fully engage
the lower bayonet fitting.
-
Refit the air pipe connector to air spring.
-
Fit road wheel and tighten nuts to 140Nm(103 lbs. ft).
-
Remove the support fromunder chassis and lower chassis onto the top
oftheairspring. Resupportchassiswithsafetystands.
-
Fit the clips to secure the top of the air spring to chassis. Do not extend the
suspension until you have re-inflated the new air spring!
-
Remove all safety stands and slowly lower vehicle part way.
WARNING: DONOTLOWERTHEVEHILCETOTHEBUMPSTOPS!
Re-inflate air spring in small amounts, frequently stopping to make sure the air spring is rolled over the lower piston 360 degrees. Make sure the air springs’ rubber bladder is rolled over the piston free of kinks or bends.
Re-inflate systemand leak test air spring and connector with a soapy water solution

 Your message must be between 20-3,000 characters!
 Please check your E-mail!
  Your message must be between 20-3,000 characters!
 Please check your E-mail!


